By The Zagosa Team. Published .
Reviewed or updated .
Keeping a hot tub safe and comfortable comes down to getting the water chemistry right. Many people are surprised to learn that the pH should sit between 7.0 and 7.8 and chlorine at least 3 parts per million for the spa to stay clean. The common mistake is thinking the test strips do all the work on their own. The real difference comes from the routine steps and careful checks that tell you whether your hot tub is genuinely a healthy place to relax.
On This Page
- Step 1: Get Your Supplies Together
- Step 2: Take Your Water Sample
- Step 3: Use Strips Or Liquid Kits
- Step 4: Record And Review
- Step 5: Adjust For Balance
The Short Version
| Key Point | Explanation |
| 1. Gather all testing supplies beforehand | Collect a reliable hot tub testing kit, gloves, a clean container, and a notepad to streamline the testing process. |
| 2. Prepare your water sample correctly | Ensure all water features are off and collect the sample from elbow-deep in the hot tub to avoid surface contamination. |
| 3. Follow instructions for testing methods | Adhere to the specific guidelines for using test strips or liquid kits; accuracy is key for reliable results. |
| 4. Maintain a detailed water chemistry log | Record test results consistently to track changes in chemical levels and identify trends for informed adjustments. |
| 5. Adjust chemicals carefully and incrementally | Make gradual changes to pH and sanitizer levels, retesting after each adjustment to avoid destabilising water chemistry. |
Step 1: Get Your Supplies Together
Testing hot tub chemicals takes a bit of care and the right kit if you want safe, comfortable water. Before you start testing, put together a full set of tools so you can measure the chemistry accurately and keep conditions where they should be.
The Kit You Need
Start with a reliable hot tub water testing kit. The Pool & Hot Tub Alliance recommends choosing a kit made for residential hot tubs. These usually come with test strips or liquid reagents that measure the key readings.
Your kit should measure several important levels: pH, total alkalinity, sanitiser concentration (chlorine or bromine), and calcium hardness.[3] Look for one with clear, easy-to-read colour charts so you can read the results without guesswork.
Alongside the kit, gather a few extra bits to make the job easier. You will want clean gloves to protect your hands, a clean container for the water sample and a notepad to jot down your readings. Having these ready beforehand keeps the whole process smooth.
Setting Up for Accuracy
The Centers for Disease Control and Prevention stresses keeping to specific chemical ranges for safe hot tub water. Aim for a pH between 7.0 and 7.8, with a chlorine level of at least 3 parts per million (ppm).
Before testing, check your strips or reagents have not expired, since out-of-date materials give inaccurate readings. Keep your supplies somewhere cool and dry, out of direct sunlight, so they stay effective. Gather the right supplies and prepare carefully, and you have the foundation for accurate water chemistry.
The table below sums up the essential testing equipment and extra items, with what each one is for, to help you organise before you start.
| Item | Purpose |
| Water testing kit (test strips or liquid reagents) | Measures pH, sanitiser, alkalinity, and calcium hardness |
| Clean gloves | Protects hands during handling of chemicals and testing |
| Clean container | Used for taking accurate water samples |
| Notepad | Records test results and tracks changes |
| Colour comparison chart | Helps interpret test strip or reagent colour changes accurately |
Step 2: Take Your Water Sample
With your supplies ready, the next key step is taking an accurate water sample that gives a true picture of your hot tub's chemical balance. This needs a bit of care so you get the most representative reading.
Start by switching off any water features like jets or fountains at least 30 minutes before sampling. They add air and stir up the water, which can skew your results. You want a calm, still surface that reflects the real chemistry of the tub.
Collecting the Sample
When you take the sample, use a clean container that you have rinsed thoroughly with the hot tub water to avoid contamination. Sink the container about elbow-deep, roughly 12-18 inches below the surface. That depth catches water from the main body of the tub, away from surface debris or recently added chemicals.
Hold the container horizontally and move it smoothly through the water so it fills naturally without too much turbulence. Aim for about 250ml, which suits most kits. Steer clear of return jets and chemical dispensers, where concentrations can be higher than the water as a whole.
As soon as you have the sample, follow the specific instructions with your kit. Some strips need dipping straight into the tub, while others want you to transfer the sample into a separate vial. Learn more about managing complex water challenges for the best results.
The Centers for Disease Control and Prevention stresses that accurate sampling is vital for safe hot tub conditions. Follow these steps and you set yourself up to understand and manage the chemistry well.
Step 3: Use Strips or Liquid Kits
Testing the water takes precision and a careful read of the results. Whether you use strips or a liquid kit, applying them correctly is what keeps your soak safe and comfortable.
Test strips are quick and simple. Take a single strip from the container, being careful not to touch the reactive pad with your fingers. Hold it horizontally and dip it briefly into your sample, making sure the whole reactive area is under for the time printed on the packaging.
Reading the Results
After lifting the strip out, shake off the excess gently and wait the stated number of seconds for the colours to develop. Most strips change colour within 15-30 seconds to show the different levels. Compare the colours carefully against the chart supplied with your kit.
 Watch your lighting when you compare colours, since artificial or dim light can throw off what you see.
Liquid kits need a more methodical touch. You usually add a set number of drops to your sample and watch the colour change. Follow the maker's instructions closely, counting drops carefully and mixing gently for accurate results. Discover more about maintaining optimal water quality to head off problems.
The Virginia Administrative Code stresses the value of precise measurements, recommending kits that can measure disinfectant residuals to within 0.5 parts per million. That level of accuracy helps keep your hot tub safe and enjoyable.
Every kit is a little different, so always read the instructions for the method you have chosen. Being consistent in how you test lets you track changes over time and sort out any imbalances quickly.
Step 4: Record and Review
Once you have collected and tested your sample, the next important step is recording and reviewing the results. This turns raw numbers into useful insight that helps you keep the tub safe and comfortable.
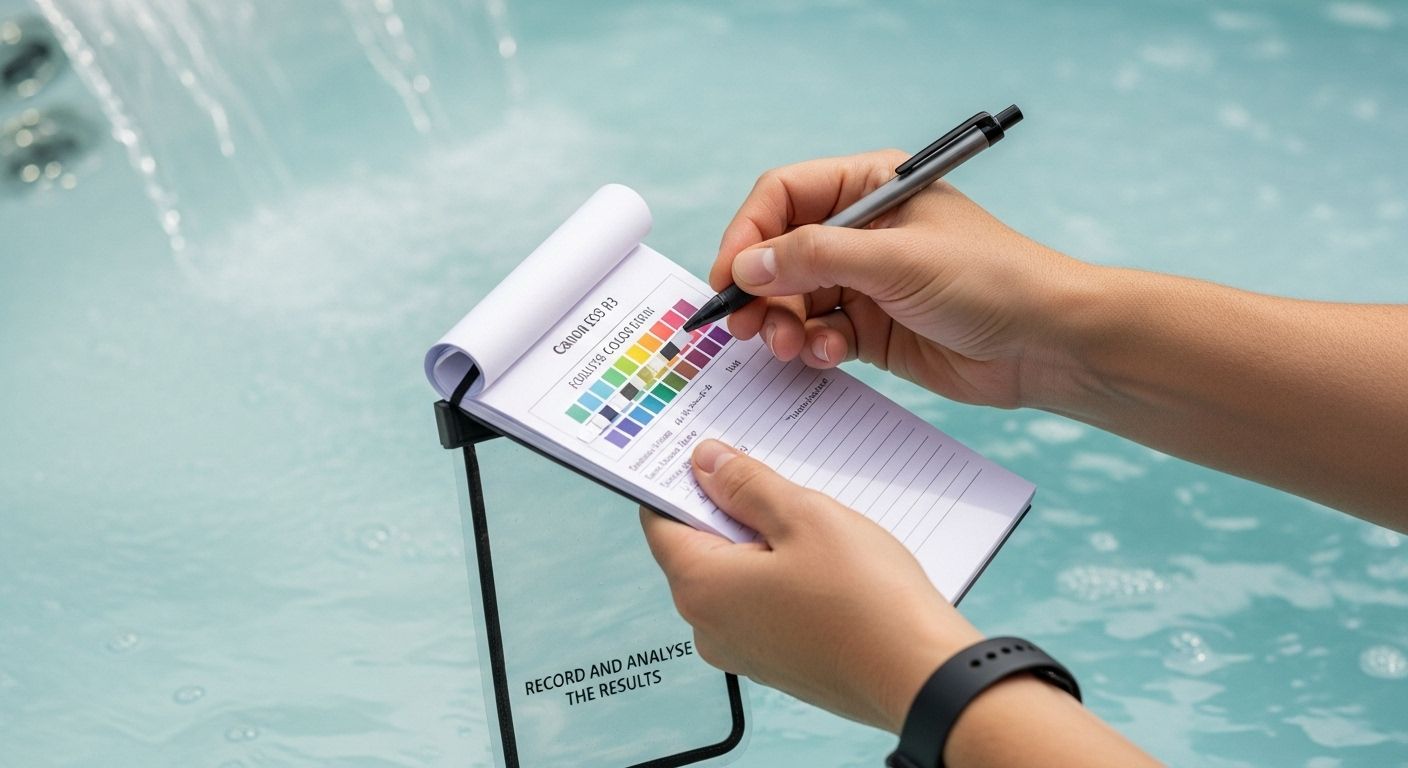
Start a dedicated water chemistry log where you can track your readings in an orderly way. Use a waterproof notebook or a digital spreadsheet to record the date, time and each reading. That record lets you spot trends, follow changes over time and catch balance problems before they grow.
Making Sense of the Numbers
Compare your results against the recommended ranges for each reading.
The table below sets out the key readings, their recommended ranges and what problems can crop up when they drift out of range, to help you read your results.
| Parameter | Recommended Range | Potential Issues if Out of Range |
| pH | 7.2 - 7.8 | Low: Corrosion, skin irritation; High: Scale, sanitiser inefficiency |
| Total Alkalinity | 80 - 120 ppm | Low: pH swings; High: Cloudy water, pH hard to adjust |
| Chlorine | 3 - 5 ppm | Low: Unsanitary water; High: Skin/eye irritation, odour |
| Bromine | 4 - 6 ppm | Low: Poor disinfection; High: Skin/eye irritation, odour |
| Calcium Hardness | As indicated by kit | Low: Corrosion; High: Scale build-up |
| Ideal water chemistry parameters typically include pH levels between 7.2 and 7.8, total alkalinity between 80-120 parts per million (ppm), and sanitiser levels between 3-5 ppm for chlorine or 4-6 ppm for bromine.[1] Any readings outside these ranges require specific corrective actions. |
Watch how the different levels affect one another. For example, an out-of-range pH can weaken your sanitiser and leave conditions where harmful bacteria can thrive. If pH is too low or too high, add a pH increaser or decreaser to bring the water back into range. Learn more about managing complex water challenges to keep your water in good shape.
The Centers for Disease Control and Prevention recommends testing hot tub water at least twice a day, especially during heavy use.[1] Keeping up a steady testing and recording habit builds a full history of your water chemistry that helps you anticipate and prevent problems.
When you adjust chemicals, make small changes and retest after each one. Add chemicals in small amounts and give them time to circulate and settle before testing again. This measured approach stops you overcorrecting and keeps the water balanced and safe.
Step 5: Adjust for Balance
Balancing the chemistry is a delicate job that needs care and precise adjustment. After recording your results, you will add chemicals in a considered way to bring the water back to where it should be. This step is key to a safe and comfortable soak.
Start with the most important reading first: pH. If it falls outside the ideal 7.2 to 7.8, use a pH increaser or decreaser. Add these in small amounts, mix thoroughly and let the water circulate for at least 15 minutes before retesting. Big chemical swings can destabilise the water, so patience and gradual change are what count.
Sanitiser and Alkalinity
Once pH is settled, turn to your sanitiser. If chlorine or bromine is low, add the right sanitiser product. If it is too high, you can let the tub air out or use a neutralising chemical. Total alkalinity acts as a buffer for pH, so sort this next if it drifts outside the recommended 80-120 parts per million.[2]
Whenever you add chemicals, follow the maker's instructions exactly. Wear protective gloves and safety glasses, and add chemicals straight into the water with the jets running so they spread evenly. Explore our guide on managing complex water challenges to head off water quality problems.
It helps to remember how connected hot tub chemistry is. Each change can affect the other readings, so after adjusting, wait at least 20-30 minutes and then retest. That pause lets everything blend and settle, giving you a more accurate picture of the water.
The secret to managing hot tub chemicals well is consistency and careful observation. Make small, measured adjustments and retest regularly, and you will gradually bring the water into balance. Do not be put off if it takes a few goes to hit the ideal mix. With practice, you will get a real feel for keeping the chemistry right.
Take Charge of Your Hot Tub Water with Zagosa Spa & Pool
Tired of feeling unsure about your hot tub's water safety? All the careful testing in the world can still leave you worried about pH that is off, low sanitiser or readings you cannot quite trust. As this guide shows, managing hot tub chemicals gets frustrating and slow when your supplies are unreliable or second-rate. What you really want is the peace of mind that your next soak will be safe, clean and properly balanced.
At Zagosa Spa & Pool, we offer a strong range of trusted water treatment products made to keep chemical management simple and reliable. If you want to stop guessing and start getting precise results every time, explore our hot tub maintenance solutions. Our carefully tested products help you balance pH, alkalinity and sanitiser with confidence. Visit Zagosa Spa & Pool now and see how easy it can be to keep your water inviting and safe on every test. Do not wait. The difference is clear to see.
Frequently Asked Questions
What supplies do I need to test hot tub chemicals?
To test hot tub chemicals, you will need a reliable hot tub water testing kit, which should include test strips or liquid reagents for measuring pH, total alkalinity, sanitiser concentration (chlorine or bromine), and calcium hardness. Additionally, you should have clean gloves, a clean container for water sampling, and a notepad for recording measurements.
How do I collect a water sample for testing?
To collect a water sample, turn off any water features and use a clean container that has been rinsed with hot tub water. Submerge the container about elbow-deep (12-18 inches) into the water, avoiding areas near return jets or chemical dispensers, to capture a representative sample without surface contamination.[1]
How do I interpret the results from test strips?
After dipping the test strip into the water sample, wait the specified time for the colours to develop, then compare the strip’s colours to the provided colour chart. Ensure you are in good lighting to accurately interpret the results, as poor lighting can distort colour perception.
What should I do if my chemical readings are out of balance?
Begin by addressing the pH levels first; if they are outside the ideal range of 7.2 to 7.8, use pH increasers or decreasers in small amounts. After stabilising pH, adjust sanitiser levels and total alkalinity as needed while following the manufacturer’s instructions closely. Retest the water after adjustments to ensure proper balance.
Recommended
- 5 Hot Tub Water Problems
- Hot Tub Bromine Tablets 20g
- How to Winterise Your Hot Tub
- Is an Ozonator Necessary for Your Hot Tub?
Sources and review
Reviewed on . Next review due .
- HSG282: The control of legionella and other infectious agents in spa-pool systems - Health and Safety Executive
- PWTAG Code of Practice: the management and treatment of swimming pool water - Pool Water Treatment Advisory Group
- Guidelines for safe recreational water environments. Volume 2: swimming pools and similar environments - World Health Organization